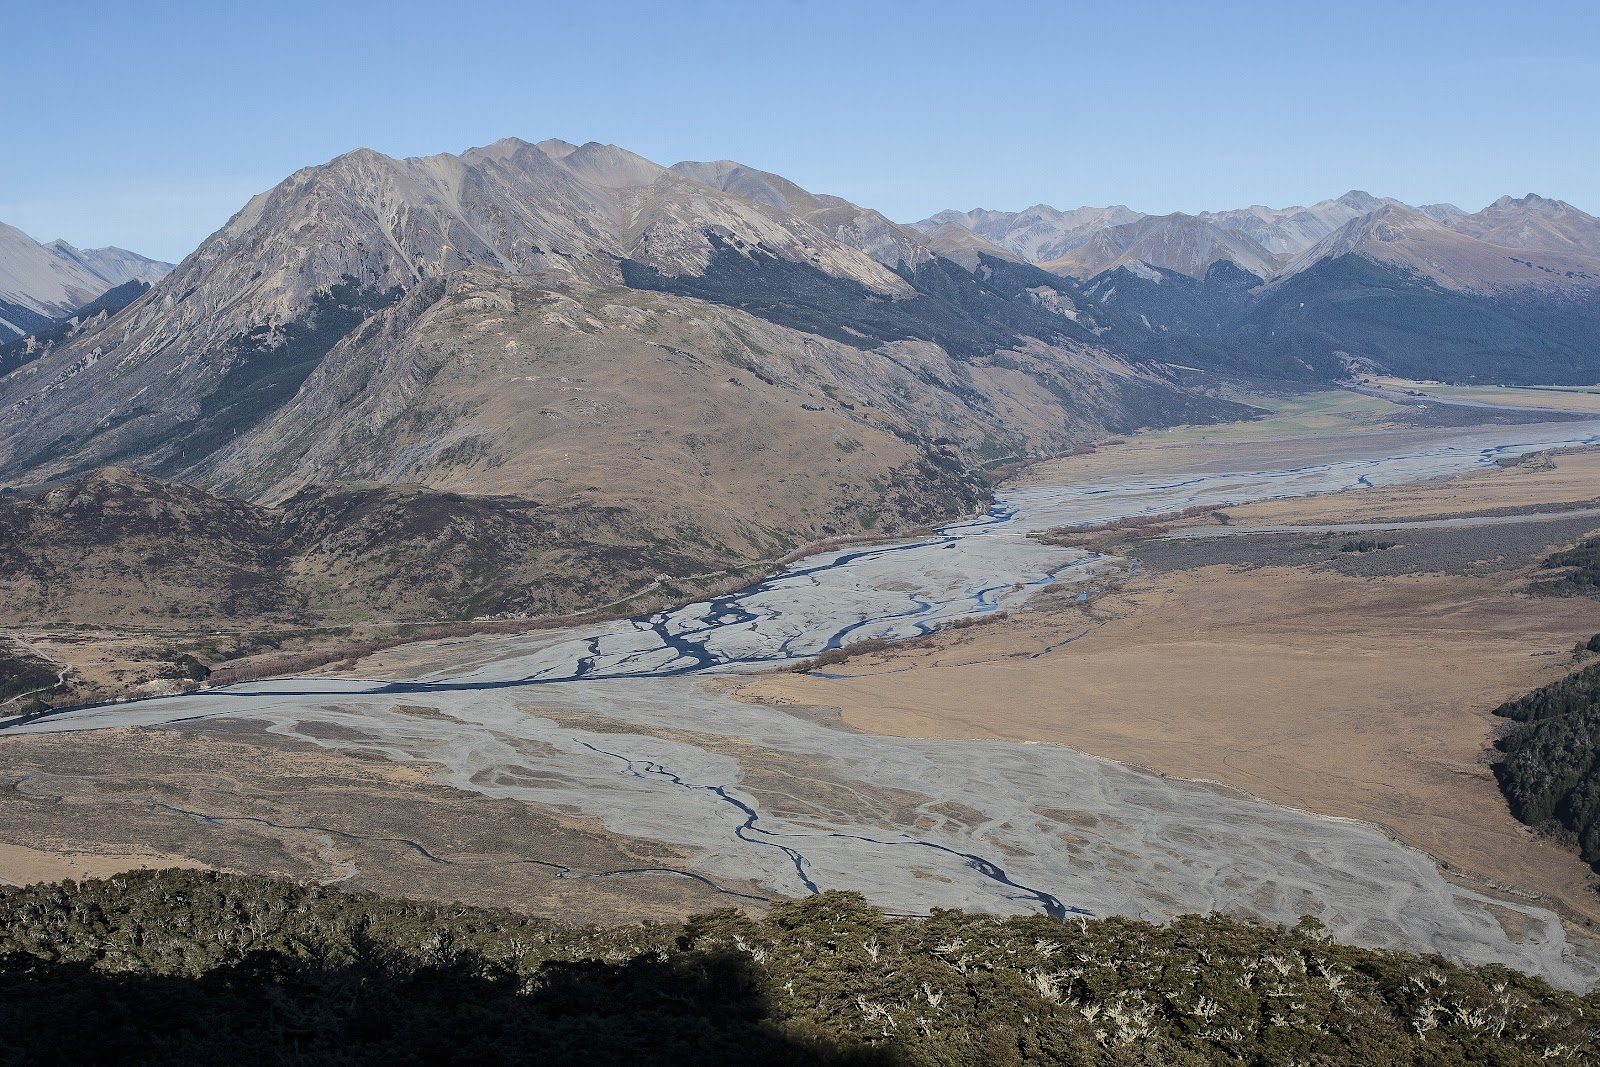
This trip marked the beginning of what will hopefully be a long tradition of Froud-James family tramps. It was time for us adults to all get away for some time in the hills together so plans were made and kids were relocated for a long weekend.
We initially planned to do the route in reverse, easing into things with an easy 3 hour stroll up the Hawdon Valley before tackling the passes the next day. However a forecast of a building nor'wester had us rethinking that idea - the thought of walking 8-9 hours into the teeth of the wind quickly persuaded us to change tactics, and so we found ourselves at the Mingha/Edwards carpark ready to go just before 1pm.
Signs were ominous already, the carpark was full - surely some of them are here training for the Coast to Coast we said to each other, not as convincingly as we might have liked! But there was no going back now - we were here, back in the hills, and ready for a great time away.
It was wet boots from the start - our first obstacle the Bealey River. Fine weather the previous day made for low river levels and an easy crossing and it wasn't long before we had made our way across the rocky riverbed to the start of the first track through the bush and into the Edwards Valley.
The track was well cut and in good condition, and started with a short, steep climb until we were about 60m above the river, then leveled off to a nice, easy gradient. Evidence of wind damage from the spring storms that battered much of the South Island was apparent through here, but posed no problems, and we quickly found ourselves back in the riverbed above the lower gorge. Guidebooks indicate that it is possible to negotiate this lower gorge with low flow so that is an alternative option to the bush track.
The next section took us out into the riverbed, hopping along the rocks for about 2km. For the most part it was easy going, crossing when necessary to find the easiest travel. In places the track at the bush edge had been washed out forcing a choice between pushing through the bush with thick extremely soft mud underfoot, or edging along rocks at the river's edge with the eroded bank for support. Iain forged ahead into the bush, having spoken to a hunter who had just come through with a warning that the mud should be avoided (he went in up past his knee!), while I scoped out the riverside route which seemed preferable, and was soon followed by the ladies.
As we approached the East Branch of the Edwards the terrain became a little rougher, early signs of the gorge up ahead, but was still easy going.
The route re-entered the bush after crossing the East Edwards, marked by the standard orange triangle about 100m upstream of the confluence with the main river. Up-river from here lies the second gorge in the Edwards, this one non-negotiable so the bush track must be followed.
The track climbed steeply, often resembling a staircase leading up through the bush. In places it involved both arms and legs, scrambling up eroded sections with tree roots offering good hand holds. Usually on such bush tracks there is a fair bit of up and down travel, climbing up and over small spurs coming down off the main range. In this part of the Edwards there was plenty of ups, but not many downs, as the terrain forced us to climb up along the ridgebacks of the spurs once we had gained the crest. At the highest point of the track we were close to 200m above the river, but a quick examination of the terrain below us revealed there really was no easier way - it was an almost vertical drop straight down to the river.
Adding to the excitement (or nerves in my case!) about halfway between the East Edwards and the end of the bush track was a descent down slabby rocks with the aid of a chain for support. While the others all made it down in quick time, my descent was somewhat slower - I could try explain it by saying I went slow to protect my camera (which took several knocks anyway) but in reality it was just being in a situation outside my normal comfort zone. Sometimes that can be a good thing, and stand you in good stead in the future!
Eventually we made our descent back to the river and from here it was an easy 30 minutes tramping alongside the river until we reached Edwards Hut.
Edwards Hut sits on a pleasant grassy terrace just above the bushline on the true left of the river at 1070m. It contains 16 bunks in two bunkrooms, has 2 tables with bench seats, cooking bench, and a logburner.
The current version of the hut was built in 1969 in the midst of the wave of Lockwood designed huts in the National Park. Other Lockwood huts include Casey Hut (built just prior to Edwards Hut, sadly burnt down in 2015), the old Hawdon Hut (1971, burnt down and now replaced), and Carrington Hut (1975).
The first hut in the Edwards Valley was built in 1940 by the Canterbury Mountaineering Club. It was a small, barrel shaped bivvy, built with materials carried in on the backs of the members - and being 1940 most of the men in their 'prime' were at war, leaving the task to those that were either too young or too old to serve.
In 1952 a 4 bunk hut was built, this time using materials dropped in by air. This hut served its' purpose well but in 1969 trampers on route to Tarn Col at the head of the valley found it burnt to the ground, probably by ashes being blown out of the fire and igniting the wooden floor (a similar fate that befell the original Hawdon Hut too, in 2005). The original bivvy remained on site until the completion of the current Edwards Hut.
First appearances were deceiving on our arrival at the hut. As we approached all seemed rather calm and peaceful, but on rounding the hut to the door a different scene unfolded - fellow trampers spilling out the door. In all, 26 were in residence at this 16-bunker so for us it meant scouting out a decent site to pitch our tents (carried for this very scenario!). It didn't take too long to find a spot not far from the hut with just enough room to pitch our tent and also the fly that Iain and Beth were carrying. It was a bit of an experiment for them, pitching the fly using walking poles, but looked like it would be successful so long as the wind didn't pick up.
Dinner was a somewhat cramped affair as we found ourselves a tiny little corner of bench space inside to cook on - not quite the nice relaxing experience so often found in a backcountry hut - so after dinner we retired to our tent and had an earlier night in preparation for the long day ahead of us.
 |
| Ready to go at the Mingha/Edwards carpark |
 |
| Heading for the Edwards Valley (right), with the Mingha to the left and The Spike (1440m) centre |
 |
| Crossing the Bealey River |
 |
| Mt Oates (2041m) at the head of the Mingha Valley |
 |
| Climbing through the bush to avoid the lower gorge in the Edwards |
 |
| Making our way along the eroded river bank in the Edwards - Iain was negotiating the boggy bush |
 |
| Scrog stop just below the Edwards River East Branch |
 |
| At the East Edwards forks |
 |
| The attractive Edwards River |
 |
| First of many climbs to get round the upper gorge in the Edwards |
 |
| Dragonfly |
 |
| Still climbing, good example of the track above the upper gorge |
 |
| One of the reasons why we had to climb so high |
 |
| The chain-aided descent in the Edwards Valley |
 |
| First view of Edwards Hut, just visible on the distant grass terrace to the left of Iain |
 |
| Lost the track amongst the head high scrub back down at the river |
 |
| Small side stream just before reaching Edwards Hut |
 |
Arriving at Edwards Hut, the deserted appearance was deceiving!
|
We woke to a perfect day - clear skies and light winds down in the valley, although an examination of the upper cloud layers revealed a very strong nor'wester. We hoped to be through the passes before the wind caught up with us, and so were away from camp at 8.45am.
Travel through the upper Edwards was straightforward, making our way through alpine grasses, with the views of Mt Oates and Falling Mountain drawing us on. Apart from a few short exceptions to cut bends in the river we kept to the true left and after about 2 hours of easy going we stopped for a snack behind a small knoll before continuing on to Taruahuna Pass at the head of the valley.
Taruahuna Pass and its' surrounds are a spectacular sight. The pass itself is a pile of broken rock, remnants of Falling Mountain which came crashing down in an earthquake in 1929. The quake measured 7.1 on the Richter scale, and sent rocks tumbling 5km down the Otehake valley. It is something of a forgotten earthquake, overshadowed in most people's memories by the earthquake that struck near Murchison just a few months later. This one measured 7.8, and resulted in 17 deaths.
It is only a short climb up onto the pass but from the top the true extent of the event can be seen. The eye roams over the Otehake valley, round to Tarn Col and continuing past Falling Mountain and back to Mt Oates standing guard above the head of the Edwards. It was enough to make one feel quite small.
Tarn Col was our objective and it looked an imposing sight, rising up almost vertically from the rock below Taruahuna Pass. We made our way to the base of the small stream running down from the col and looked up - around 150m vertical climbing, but at least it wouldn't take too long.
Initially it was straightforward, the streambed allowing easy but steep progress. Around halfway up a cascade in the stream forced us out into the tussocks. It was steep going, at times resembling rock climbing but with small tussocks and grasses for hand and footholds. The strength of tussocks is quite remarkable, the thought of what might happen should one pull out didn't bear thinking about. We reached the top of the col after about an hour of slow but steady climbing and took the opportunity to have lunch, knowing we had reached the highest point of the trip.
After a half hour break we were on the march again, with the descent from Tarn Col to the Otehake East Branch the task at hand. After skirting round the tarn we dropped down into the stream draining it. Although this section is marked on the map as being poled, the poles were few and far between so it was mostly a case of finding the best route down the stream (look for cairns), which fell in a series of mini cascades. At times the foot trail was well defined through the scrub, while at others it was non existent, making for slowish progress as we picked our way down to the river. For all this though it was never difficult and we arrived at the Otehake after about 90 minutes.
By now the wind was strengthening so we found a decent sized rock to shelter behind while we enjoyed a scroggin stop. With the cloud building behind us in the west we made it a quick stop, and set off up the Otehake towards Walker Pass, which would give us access to the Hawdon Valley. The Otehake was delightfully clear, with blue pools tucked in the less turbulent areas, but after only 15 minutes of rock hopping we left it behind to start the short climb up onto Walker Pass.
Atop the pass the wind attacked with full force, knocking us off stride with its' frequent gusts. Just as there is at Tarn Col, there is a lovely tarn just below Walker Pass also, but this one had a less serene appearance to the previous, with small waves being whipped up on the surface - foiling my plans to photograph a nice reflection of the mountains opposite. The route off the pass bore much similarity to that of the one off Tarn Col, as again we found ourselves criss-crossing a small stream amongst the scrub. This stream (Twin Fall Stream) descended at a much gentler gradient and made for pleasant tramping.
The final test came on the climb up out of the streambed up onto the rocky knoll on the true left, from which the bush track down to Hawdon Hut begins. Here we were fully exposed to the wind as it blasted us side on as we climbed the rock slabs to the top of the knoll. We would hang on and wait for a lull in the wind before quickly getting in as many steps as we could before it hit us again. By now I was climbing with 2 hats as well as my walking poles in my hand, as Julia had had hers blown off on the way up. Although not technical climbing by any stretch, the wind made for some uncomfortable moments.
We ducked down over the crest of the knoll, hunkering down at the start of the track for a final snack before the steep descent to the Hawdon. For Beth and I with knees aching now it was to be a slow descent, nursing them down in as comfortable a way as possible. Julia on the other hand was in her element - going downhill is definitely her thing and she was quickly out of sight. Having pushed on while the others took a rest, I found her almost at the bottom so we made for the hut which I knew to be only minutes away with the idea of getting some water on for a brew for all of us.
Soon the familiar sight of Hawdon Hut appeared through the trees, 9 hours after leaving the Edwards. To our great joy there was only 6 people there, most of them a party that had been about half an hour ahead of us most of the day. This was to be a far more enjoyable evening, with plenty of room in the large 20 bunk hut to sit and relax.
Hawdon Hut is one of DOC's newer style huts, built in 2007 to replace the original that was built in 1971 and burnt down in 2005. For those who have visited the old hut, the new one is now about 15 minutes further up-river, above Discovery Stream. It has 20 bunks, platform style, in 2 bunk rooms and plenty of living and kitchen space.
 |
| Early morning in the Edwards Valley, our campsite to the right |
 |
| Breakfast time - one of the joys of not being in the crowded hut |
 |
| Setting off up the Edwards Valley, with Falling Mountain (1901m) centre background |
 |
| Looking back towards Edwards Hut, Mt Williams (1718m) bathed in morning sun |
 |
| Interesting cloud blowing across the valley |
 |
| Amber Col (centre), flanked by Pts 1731m (left) and 1828m (right), Falling Mountain far left |
 |
| Mt Oates (2041m) at left, with its' North ridge leading off to the right |
 |
| In the upper Edwards valley, nearing Taruahuna Pass |
 |
| Scrog stop before tackling the passes |
 |
| View back down the Edwards Valley |
 |
| Mts Scott (2009m) and Wilson (2035m) on the Polar Range, from the upper Edwards |
 |
| Approaching the foot of Taruahuna Pass (1252m) |
 |
| Negotiating the rock which forms Taruahuna Pass, once part of Falling Mountain |
 |
| The NW aspect of Falling Mountain |
 |
| Feeling small as we cross Taruahuna Pass beneath Falling Mountain |
 |
| Tarn Col (1368m), ascent route climbs the grassy gully to the left of the scree |
 |
| Starting the climb up to Tarn Col |
 |
| Looking back down from the top |
 |
| Mt Franklin (2145m), as seen from Tarn Col |
 |
| The tarn that gives the col its name, Mt Hunt (1825m) at the left of the ridge in background |
 |
| Typical terrain on the descent from Tarn Col to the Otehake East Branch |
 |
| Beth and Iain picking their way down |
 |
| Reaching the Otehake River East Branch |
 |
| Scrog stop in the Otehake |
 |
| Otehake River East Branch - beautifully clear |
 |
| Working our way up the Otehake |
 |
| Julia crossing the Otehake |
 |
| Start of the climb out of the Otehake up to Walker Pass |
 |
| Approaching Walker Pass (1095m) |
 |
| Looking back on our line of travel, Otehake in foreground, stream from Tarn Col coming in from the left |
 |
| On windswept Walker Pass |
 |
| There's a tarn here too! |
 |
| Skirting the amazingly blue tarn |
 |
| Looking back to Walker Pass from the rocky knoll above the Hawdon |
 |
| Hawdon Valley and Discovery Stream confluence, from the knoll |
 |
Beth arrives at Hawdon Hut
|
Just as had been forecast, rain fell overnight but when we woke it had passed, leaving behind grey but non threatening skies. The day ahead was an easy one, the route down the Hawdon straightforward (described more fully
here ). The ladies set a cracking pace, finding the flat riverside travel to their liking, and we reached the East Hawdon Stream in just over an hour. After this we slowed slightly but were pleased to find that the usual foot-aching plod down the last section in the riverbed was much easier than previously experienced due to a well formed quad-bike track through the riverbed. DOC staff are up and down the valley a lot, trapping predators and monitoring the population of orange fronted parakeets which reside here.
The final ford of the Hawdon proved to be our hardest of the trip. The river narrows to one, deeper, channel just before you reach the shelter and carpark and with a bit of overnight rain it made for a swiftly flowing current at about mid thigh height. We linked up and crossed safely, reaching the car about 2hr 45mins after setting out in the morning. All the was needed was to collect the car from Bealey and head for the Sheffield Pie Shop!
Thanks Froudies for the great trip - look forward to the next edition!
 |
| Grey morning in the Hawdon valley |
 |
| Ready to depart Hawdon Hut |
 |
| Just downstream from Discovery Stream, this section was all bush on my last visit - serious flood damage! |
 |
| Easy tramping alongside the Hawdon River |
 |
| Julia in the Hawdon |
 |
| Final ford of the Hawdon River, our deepest and swiftest of the trip |
 |
Crown Copyright - Land Information NZ
Access: Take SH73 towards Arthur's Pass. The Edwards valley carpark is about 500m north of Greyney's Shelter on the right. The road to the Hawdon Shelter is signposted at the Mt White turnoff (passed on the way to the Edwards).
Time: Carpark to Edwards Hut 5hrs, Edwards Hut to Tarn Col 4hrs, Tarn Col to Walker Pass 2hrs 30mins, Walker Pass to Hawdon Hut 1hr 30mins, Hawdon Hut to carpark 3hrs
Map: BV20 Otira, BV21 Cass
Huts: Edwards Hut (16 bunks), Hawdon Hut (20 bunks)
|